To move around the map click and hold the left mouse button and drag the map.
Click the Plus + to zoom in
Click the Minus - to zoom out
Click Default extent to return to the original extent of the plat map (State of Utah)
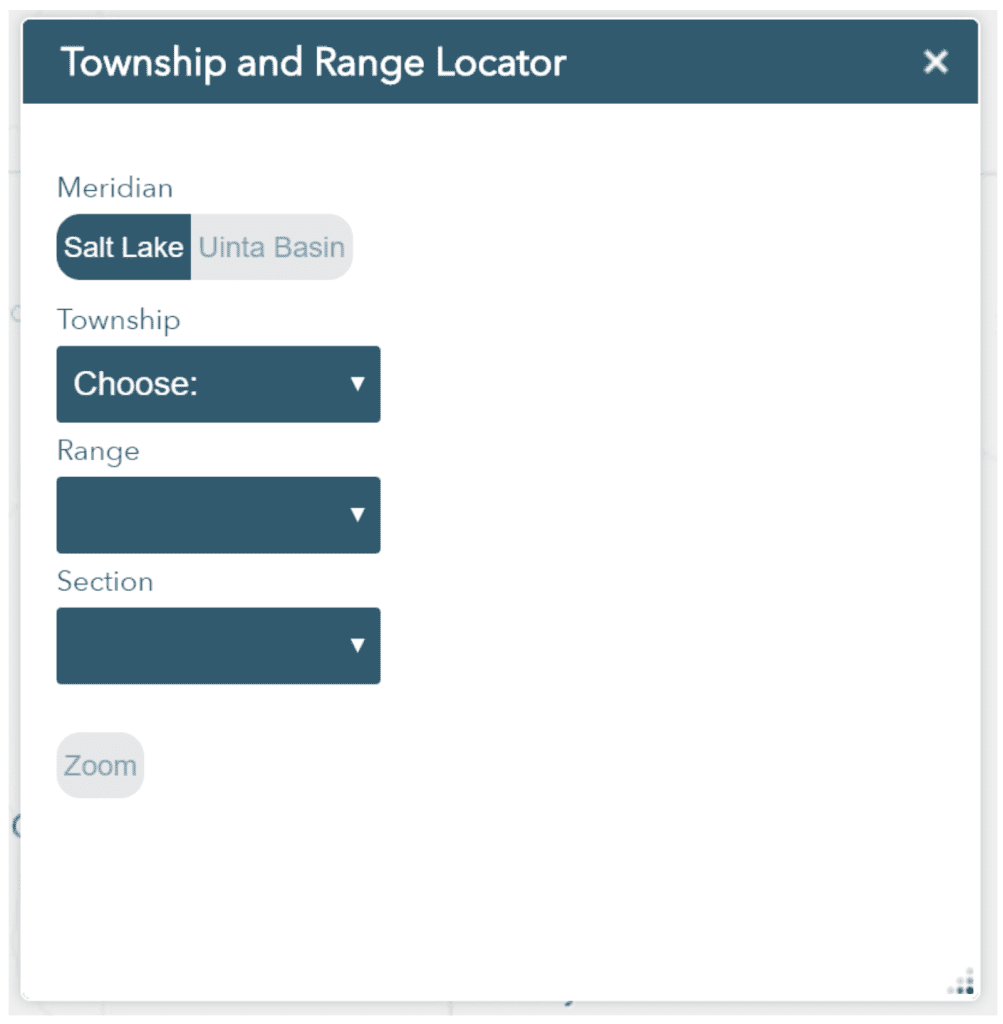
Township and Range Locator
Use the township and range locator to zoom to a specific township and range.
The State of Utah has two meridians: Salt Lake and Uinta Basin. The Salt Lake Meridian covers the majority of the state while the Uinta Basin Meridian covers areas of Duchesne, Uintah and Wasatch Counties.
How to Find a Township and Range
Select Meridian (Salt Lake or Uinta Basin) from the drop-down list.
Select Township (only valid townships will display according to the Meridian chosen) from the drop-down list.
Select Range (only valid ranges will display according to the Township chosen) from the drop-down list.
Select Section (optional) from the drop-down list.
Click Zoom to zoom to the selected Township, Range and Section.
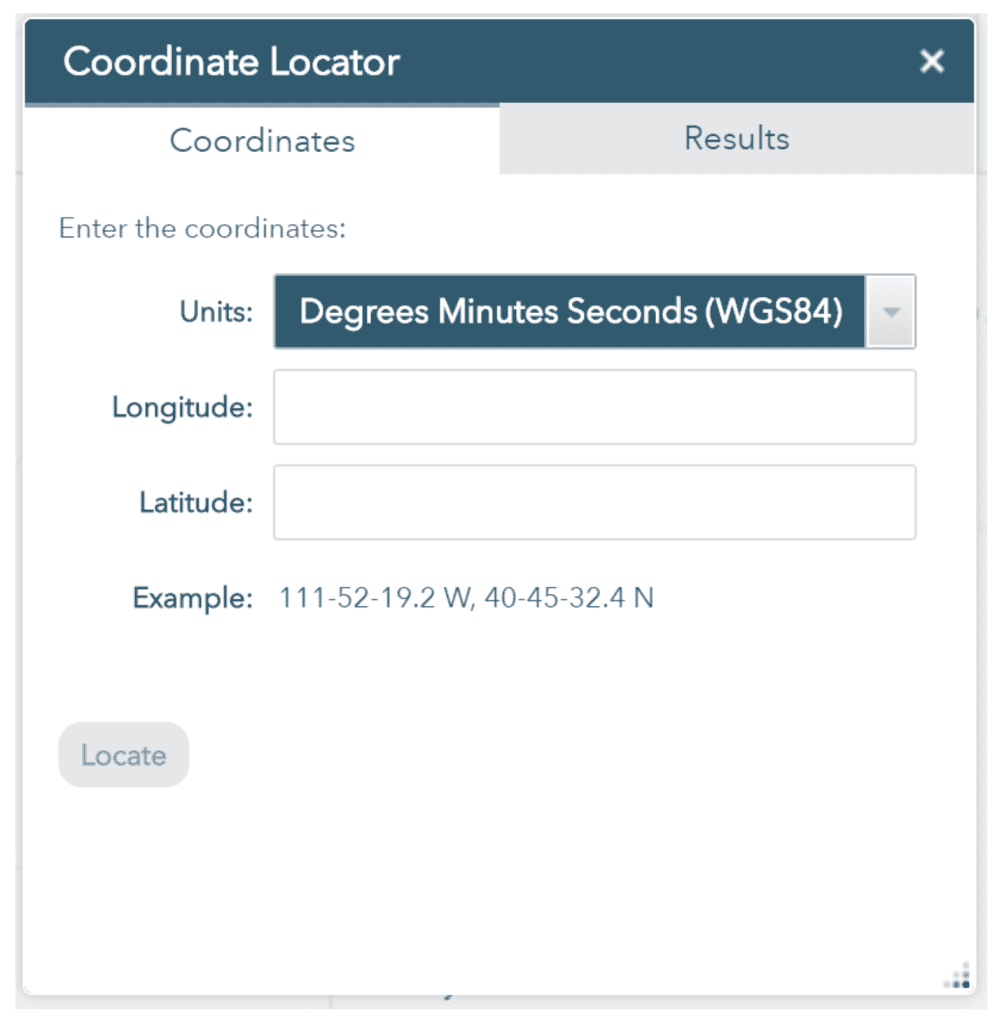
Coordinate Locator
Use the coordinate locator to find a specific GPS coordinate location on the map.
GPS coordinates define the longitude and latitude distances of a specific place on the surface of the earth. Longitude is the distance east or west of the Prime Meridian. Latitude is the distance north or south of the Equator.
How to Find a Coordinate
Select Units from the drop-down list.
Degrees Minutes Seconds (DD°MM’SS.S”)
Decimal Degrees (DDD.DDDDD)
Degrees Decimal Minutes (DDD°MM.MMM’)
NAD 1983 UTM Zone 12N (Easting X, Northing Y)
Enter the longitude and latitude or X and Y in the correct format. Use the example as a reference.
Select Locate to zoom to the selected GPS coordinate.
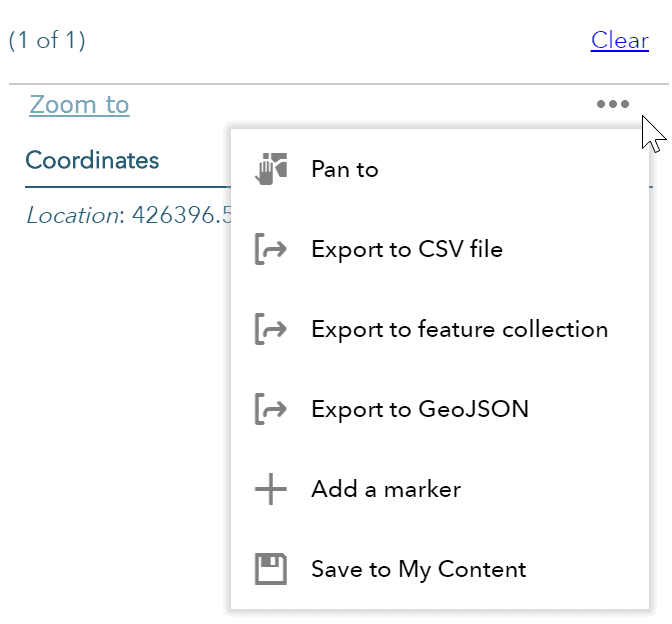
Results
The Results tab will open as well as the SITLA Pop Up Panel.
In the SITLA Pop Up Panel click the ellipses … to view different options.
Select Clear to remove the selection.
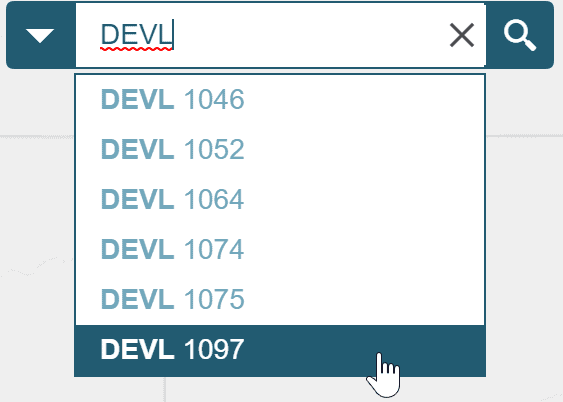
Search
Use the SITLA search to find a specific SITLA lease or place in Utah.
How to Find a SITLA Lease
In the search prompt start typing the class abbreviation of the lease to find.
ESMT – Easement
ROW – Right of Way
PRED – Predesignation
WDRN – Withdrawn
RIP – Range Improvement Project
C – Certificate of Sale
SULA – Special Use Lease Agreement
ML – Mineral Lease
MP – Materials Permit
DEVL – Development Lease
Type a space after the abbreviation (a space carriage is needed between the class abbreviation and the lease number to properly filter results).
The list will automatically start to populate based on the input.
Type in a lease number if it does not display in the list.
Highlight and click the lease from the list to zoom to the selection on the map.
*Utah places can also be searched in this manner. Start typing Moab in the search prompt to see a filter of places related to Moab.
Explore Layers
General Layers
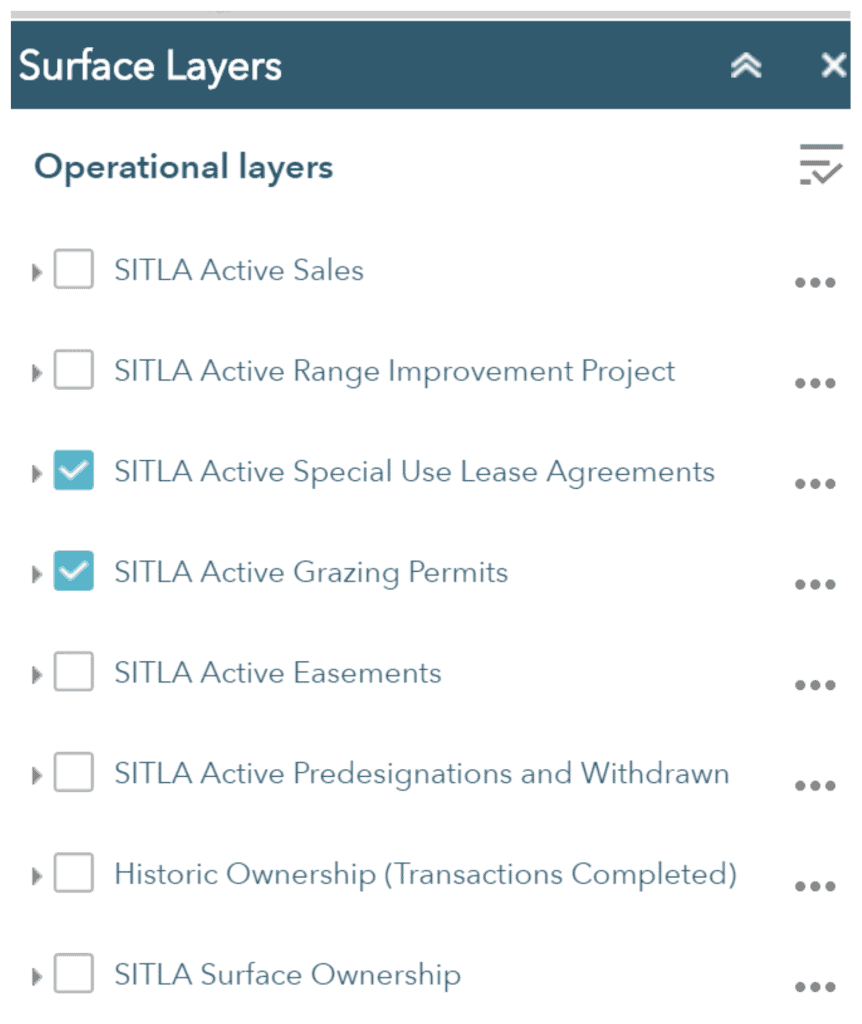
Surface Layers
Oil & Gas Layers
Other Minerals Layers
Development Layers
Use the SITLA layers tools to explore SITLA active leases and ownership by working group.
How to Use the SITLA Layers Tool
Click the check-box next to the layer name to check the layer on or off. A check mark next to the layer indicates that the layer is currently displayed in the map.
Some layers may not be visible at the current map scale even though they are checked on. These layers are scale dependent* and are indicated as being grayed out. To activate these layers zoom in or out to the appropriate scale. Once the appropriate scale is found the layers will automatically display.
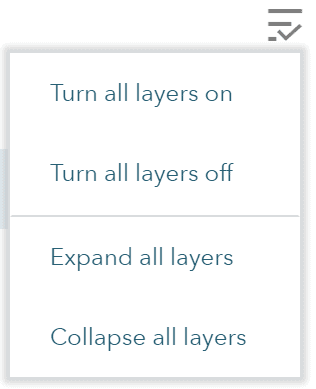
Click the button next to “Operational layers” to check on or off ALL layers.
*Scale dependent layers include township lines, section lines, quarter lot lines and development lots.
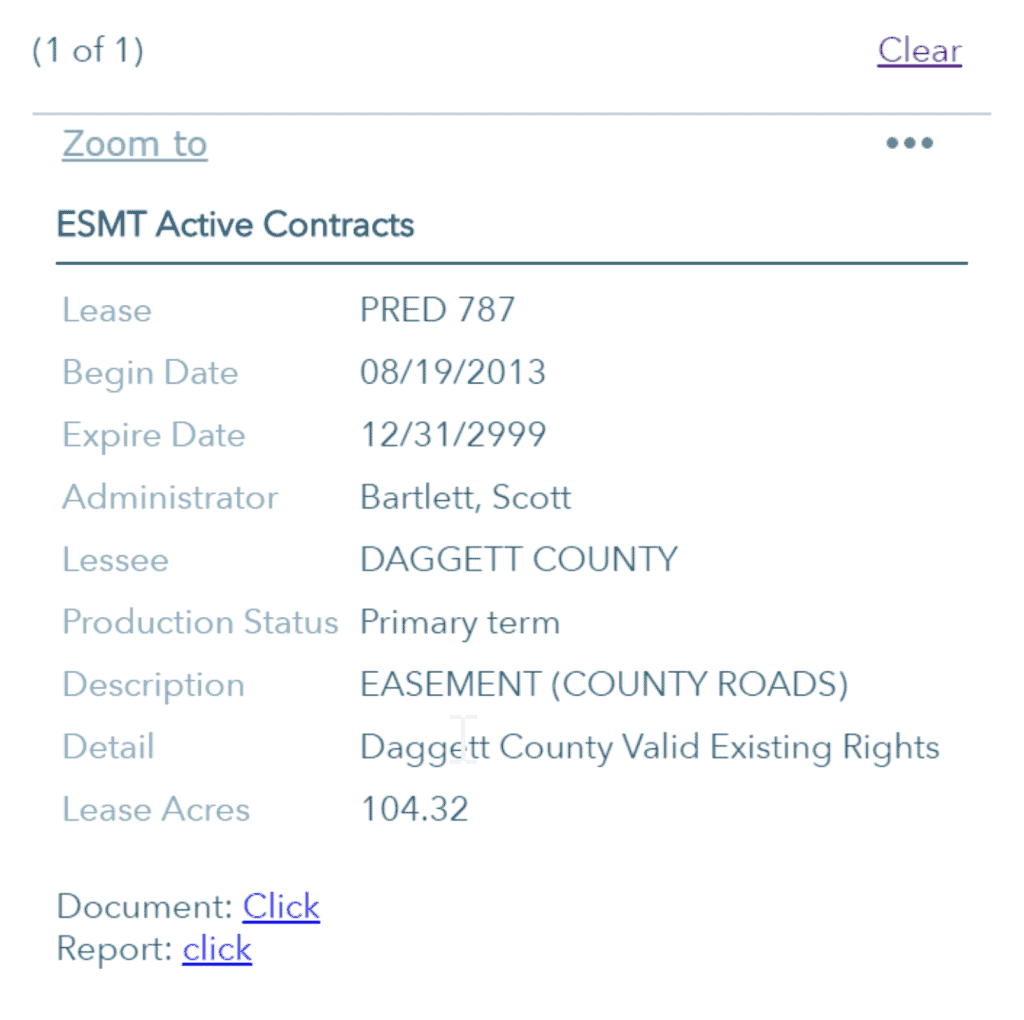
Pop-Up Panel
The Pop-Up Panel is designed to automatically open on the left side of the map and populate with information regarding SITLA leases, SITLA ownership and GPS coordinates.
How the Pop-Up Panel Works
Identify a lease or ownership parcel by clicking on it in the map.
The lease or ownership parcel will highlight in the map and the Pop-Up Panel will automatically open and populate with information about the lease or ownership parcel.
Click Zoom to to zoom to the entire extent of the lease or ownership parcel.
Click Document to view a PDF of the lease agreement.
Click Report to view a PDF of the details of the lease or ownership parcel.
Click Clear to remove the results from the map and the Pop-Up Panel.
*Coordinate Locator and SITLA Search use the Pop-Up Panel to display results.
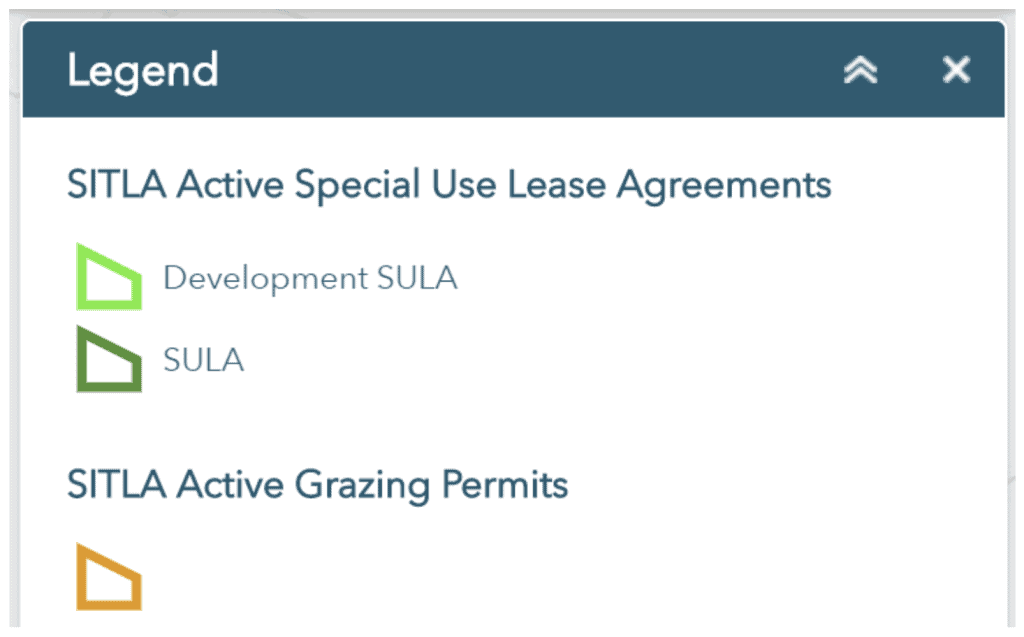
Legend
Use the legend tool to view the contents of the map.
How to Use the Legend
Click the legend tool to view the contents of the map.
The legend will only display operational layers that have been checked on.
If an operational layer has NOT been checked on it will NOT display in the legend.
*Township, Section and Quarter Lot Lines will NOT display in the legend, even if they are checked on.
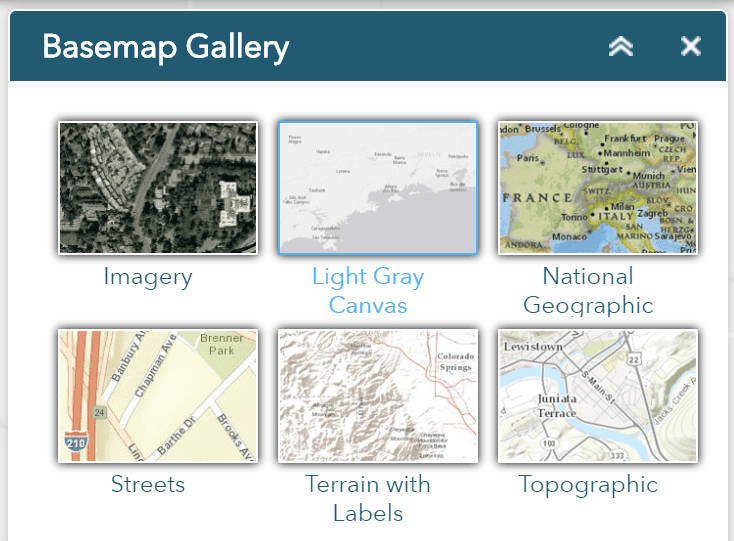
Basemap Gallery
Use the basemap gallery tool to choose between a variety of basemaps.
How to Choose a Basemap
Select a Basemap from the gallery.
Choose from:
Imagery – (“satellite imagery for the world and high-resolution aerial imagery for many areas in WGS 1984.”) view full details
Light Gray Canvas – (“provides a detailed vector basemap for the world featuring a neutral background style with minimal colors, labels and features.”) view full details
National Geographic – (“developed by National Geographic and Esri and reflects the distinctive National Geographic cartographic style in a multi-scale reference map of the world.”) view full details
Streets – (“provides a detailed vector basemap for the world that includes highways, major roads, minor roads, railways, water features, cities, parks, landmarks, building footprints and administrative boundaries”) view full details
Terrain with Labels – (“displays multidirectional hillshade under map content from a vector tile layer of populated place names, and admin and water labels with boundary and road lines.”) view full details
Topographic – (“displays highways, major roads, minor roads, railways, water features, cities, parks, landmarks, building footprints and administrative boundaries, designed for use with shaded relief for added context.” view full details
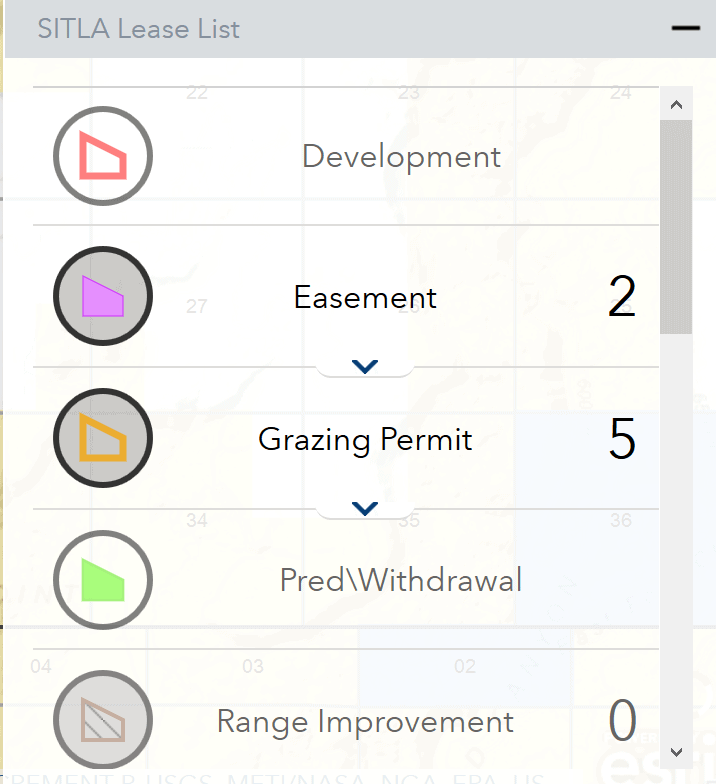
Lease List
Use the Lease List tool to display the number of leases within the current map extent.
How to Use the Lease List Tool
Use the SITLA Layers tools to turn on specific leases in the current map extent.
Click the Lease List tool to view lease counts. Only layers that have been checked on in the map will display results.
Click the drop-down arrow next to the lease type to view individual leases in the current map extent.
Click an individual lease to see it flash on the map and view a pop-up.
*Leases that are missing from the GIS database will NOT display in the map.
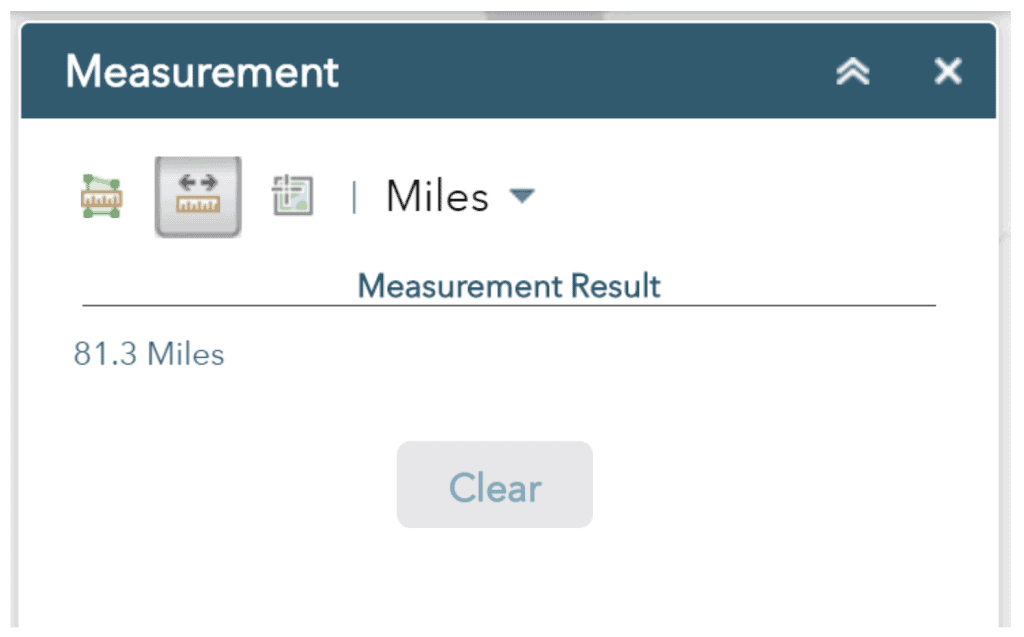
Measurement
Use the measurement tool to measure areas, length or GPS location.
How to Use the Measure Tool
Select a Measurement option.
Area (Acres, Sq Miles, Sq Kilometers, Hectares, Sq Yards, Sq Feet, Sq Feet (US) or Sq Meters)
Distance (Miles, Kilometers, Feet, Feet(US), Meters, Yards or Nautical Miles)
Location (Latitude and Longitude)
Click the drop-down area and choose the units to measure in.
Measure
Area: click on the map to start and continue clicking on the map to represent a polygon. Double-click when finished.
Distance: click on the map to start and continue clicking on the map to represent a line. Double-click when finished.
Location: click on the map to represent a location.
Results are displayed in the window panel in the units that were selected.
Click the Clear button to erase measurements.
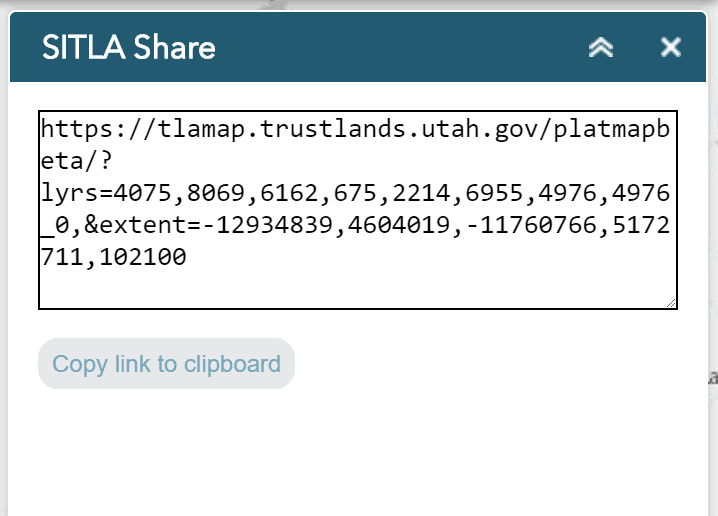
Share
Use the SITLA share tool to share the current plat map extent with others.
How to Use the SITLA Share Tool
Click the SITLA Share tool.
A link for the current map extent is created. Notice how the link updates as you navigate around the map.
Click Copy link to clipboard.
Right-click and paste the link into email to share with others.
*Using the SITLA Share tool will share the map extent as well as any layers that have been checked on in the map.
Print
Use the print tool to create a printout of the current map extent.
How to Print
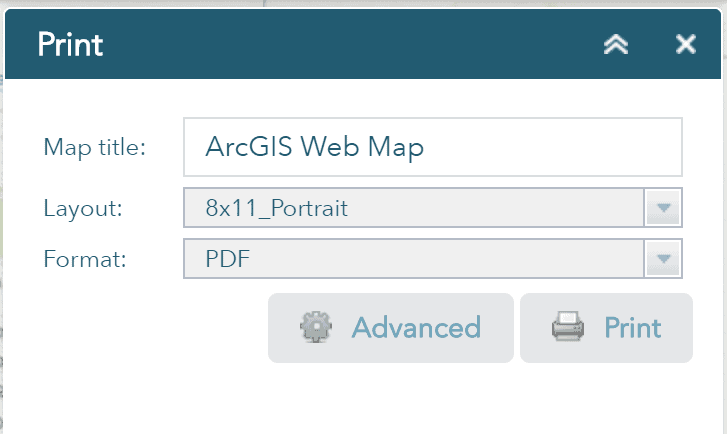
Click the Print tool.
Type a title for the map in Map title
Choose a Layout format
11x17_Landscape
11x17_Portrait
8x11_Landscape
8x11_Portrait
MAP_ONLY*
Choose a print format
EPS (Encapsulated PostScript – high resolution printing)
GIF (Graphics Interchange Format – high quality)
JPG (Joint Photographic Experts Group – lower quality)
PDF (Portable Document Format – this is the default)
PNG32 (Portable Network Graphics – 32 bit)
PNG8 (Portable Network Graphics – 8 bit)
SVG (Scalable Vector Graphics – XML)
SVGZ (Scalable Vector Graphics – smaller than SVG)
Click Print. A progress bar will display and a link to the printout will display when completed.
Print the printout.
Click Clear to remove the printouts.
*Please exercise caution when using the MAP_ONLY layout. The printout will NOT include a legend or disclaimer. Do not use this option for maps that will be distributed.
Advanced Print Options
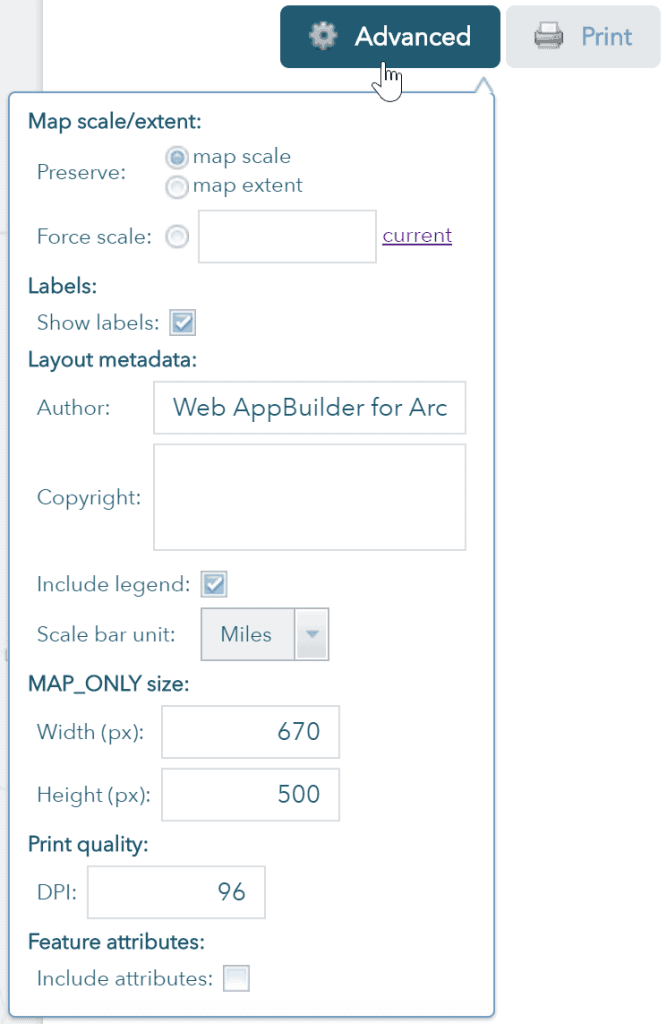
Click Advanced for more print options (this will NOT be available for the MAP_ONLY layout).
Choose to preserve the Map Scale/Extent or enter a scale.
map scale – the printout will maintain its scale around the center point
map extent – adjusts the scale on the printout to fit the current map extent
Check to show Labels. Labels will include township and range, section numbers and lease numbers on the printout.
Check to include a legend.
Choose the units for the scale bar (Miles, Kilometers, Meters or Feet).
If using the MAP_ONLY layout choose the size of the printout in pixels.
Choose the DPI (dots per inch) for the printout. The higher the DPI the better print quality (96 is the default).